
Tanks a Lot!
Or, how to make an oil tank with a few hand tools
from Sport Aviation, November 2002
by Kent White
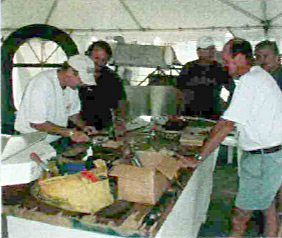 A group effort: Workshop attendees at EAA AirVenture Oshkosh 2002 making an oil tank for the Swallow. Some of these guys are skilled pros!
Making' tanks can be a lot of fun, a learning adventure, or you can skip all that and hire someone to make them. Sometimes it's more fun to watch someone else suffer through the darned thing than to sweat through it yourself, so think of your buddies when searching for a likely volunteer to make one for you. Tanks for airplanes may be made of any one of several metals, including terne plate (lead-coated steel sheet), aluminum sheet, or even stainless steel.
Tanks in older airplanes are usually made of the terne, which is blanked, bent, folded, assembled, and then soldered with either a torch or a soldering iron. A 60:40 solder is generally used (60% lead; 40% tin)â the same as used in radiator repair shopsâalong with a resin-type flux that will neither etch nor corrode the steel. These tanks may also have baffles and fittings that are riveted in place, with the rivet heads then soldered over to avoid nasty seeps or leaks.
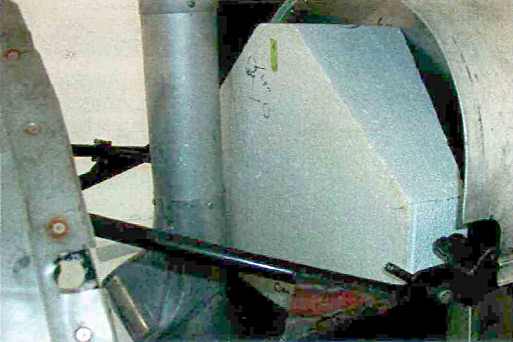 Solid sculpted Styrofoam pre-fits the spot for the tank.
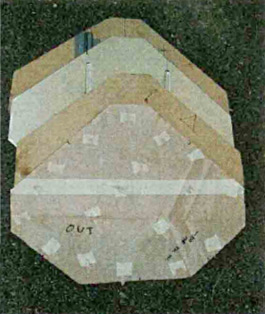 Form blocks, a formed aluminum panel, and a flow form jig show how flexible and simple some fixtures can be.
Aluminum tanks are mostly formed and gas welded, with the bungs and baffles riveted in place and the rivet heads then brazed over. These aluminum tanks may be surge or header tanks, expansion tanks, oil tanks, wing tanks, drop tanks, or main fuel tanks. Alloys of choice may be 1100 (rare, as strength is low), 3003 (better, but still soft), or 5052 (strong, corrosion-resistant, and weldable). The Lockwood Air Cam uses a structural tank of riveted 2024, which is then sealed with Proseal. The corrosion potential is handled by the sealant, making 2024 a good choice for the strength required.
Gary Buettner, the workshop cochairman, asked me to make a tank for the Swallow Mailplane during the AirVenture Workshops this year, as it was thought to be a good teaching tool for attendees curious about such constructions. This airplane is under restoration for United Airlines and is being reconfigured to replace its OK5 with a round motor during this restoration.
Mockup and Patterns
The folks at the EAA AirVenture Museum had already carved an accurate dummy tank from a piece of rigid Styrofoam and had it mounted in correct location, with all of the fittings laid out on the surface. By having this mockup, we were able to confirm that we would be able to install and remove the finished tank without any difficulty.
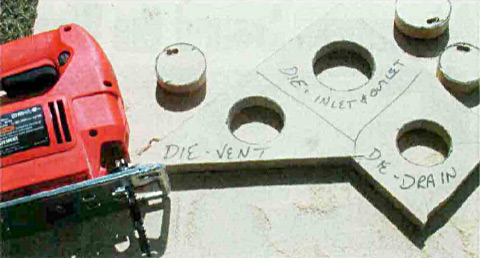
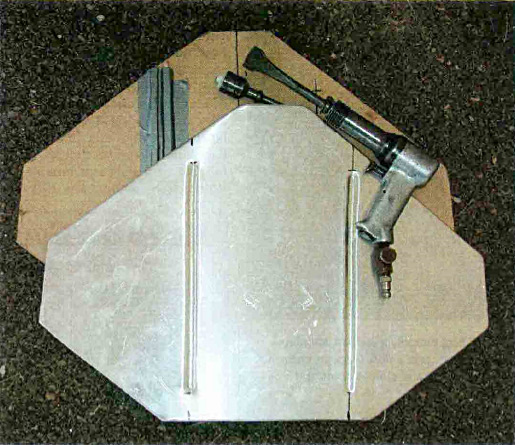 A simple flow-forming setup saves $$$ over buying a bead roller machine
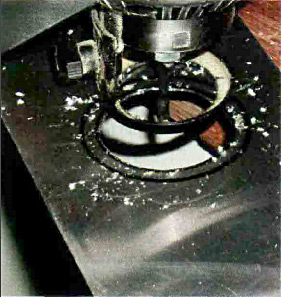 We didn't have a nice drill press for making slick round holes, so we routed them out, freehand.
The fittings for the inlet, outlet, vent, drain, and filler neck were all obtained previously from standard parts suppliers, enabling construction to proceed apace during AirVenture week.
Using the Styrofoam mockup, we cut out paper patterns for the front panel, the rear panel, and the circumferential band. From these patterns, we cut the medium density fiberboard (MDF) blocks for forming the edges of the panels up at a 90-degree angle for welding. The rear panel had a 50-degree bend at its midsection, so the entire panel was simply laid out, blanked in 3003 aluminum, formed in the blocks, and then bent up to fit the mockup. In order to make this bend using only the workbench, it was only a matter of clamping a section of MDF across the width of the panel with the nice straight edge on the bend line. Then, using another section of MDF as a lifter or "leaf," we hoisted it up to make a very even and distortion-free bend across the panel.
 Don't waste time making fancy flaring dies in your lathe or paying someone else to machine them. A cheap sabre saw saves the day.
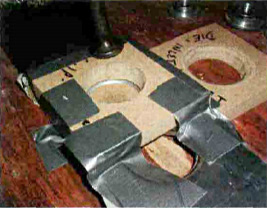 Whack those flares in! No mechanical press needed.
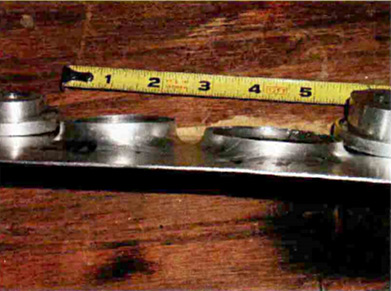 How flared are those holes, anyway? You did that with hand tools?
Making the stiffening ribs (beads) in the panels involves either using a bead-forming machine (bead roller) with the proper dies or making another set of forming dies in the MDF. We did both for the workshop, as we just happened to have a spare bead roller machine laying around, and the MDF was in long supply as well. Forming the beads or ribs with the MDF was as simple as pairing up two nicely cut edges an appropriate distance apart, clamping up the panel, and whacking a radius bar (3/8-inch round steel rod) into the ditch, using a rivet gun set up with a flow forming schnooble attached.
We cheated a little bit by doing a localized anneal down the prospective ditch prior to the whacking. The beads turned out straight with even depth, and the panel remained straight as well. Yee-haw!
Fittings
We made all the little pressform blocks for flaring the openings for the aforementioned threaded fittings (bungs). Many onlookers at this point were wondering how the interesting profile in the fittings would be used. As soon as they saw the fitting fixed into the flared opening, they understood that the resultant standing joint was for making a pretty welded beadâ without distorting the surface. To make the pressforms, we laid out the dimensions of the hole required by the fitting, and then added enough for a flare. This makes the hole about 1/2-inch diameter smaller. But not to worry; it all smacks together very well. A little taper on the plug helps because it leads into the hole better, and sanding for touch-up makes the dies fit very nicely. We used the 1/4-inch round over bit on the router (a handy tool!) to radius the female die, giving a nice finish to the flared opening.
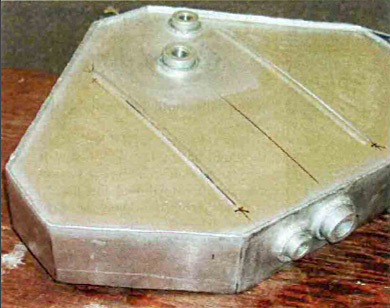 The finished tank looks nice enough to have been made in a real shop..
Once the fittings were set and laid all snug in their places, we gas welded them all, right down to the laces. Now that all the parts on the front and rear panels were done, we laid out the band, cut it out, and bent it up. Clamping it around the periphery, we made a few adjustments by knocking the flanges a bit. It's amazing how a little tweaking here and there can make a saddle fit a sow! Commencing with tacking a few critical spots around the circumference, we then added tacks around the whole thing until they were an inch or two apart. Then we welded the whole panel in place. Now, faced with a discrepancy on the back panel, we reworked a little of the flange until it fit as well as the front.
Aluminum tanks are mostly formed and gas welded, with the bungs and baffles riveted in place with the rivet heads then brazed over.
Like I always say, "If it looks a little rough on the first one, just wait till you get done making the second one, because it will look just fine."
EAA Technical Counselor Kent White achieved master technician's status in 1976 at Harrah's Auto Collection, where he restored metal components for aircraft and autos. He started his own metal restoration company in 1977 and now teaches, writes, and develops tools for metalworking while he still pounds out parts. He encourages any welder or metalworker to contact him in regard to preserving the traditions of aircraft metalworking.
Contact him.


