Formation of a Copper Lotus Finial Part 6
Doodads (Mechanical Drawings)
I chose 16 gauge stainless for the can at the base, with a bottom butt-welded with the TIG, and a top that had the edge turned down 25 degrees to shed water and locate properly on the can. The ½" hex head lag bolts (four each) hold through the bottom and were later heavily lathered with sealant, along with the lid. One trip back to the site, and I had the rubbing of the slate pattern for the flashing, the roof pitch, the mounting well diameter, and the depth necessary for the can along with the roof pitch intersection line for the flashing, finishing height of the brass trim ring, and intersection of the petal ring. Whew! The can I had made was plenty high, and stout enough, so next the petals were all joined on the line with rivets (1/8 Cu), and soft solder (Sn63)
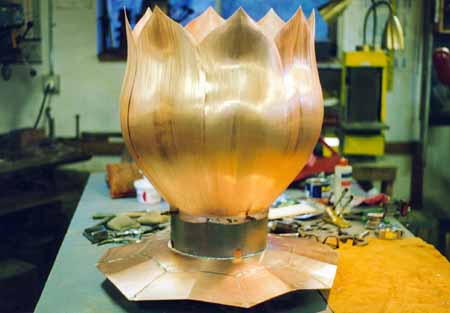
The segmented flashing
The flashing, barely glimpsed by casual observers, was a ``styling exercise", an experiment to see if I could indeed segment a conic section with some detail, and have it fit, function, and look nice over an irregular surface. The center section, constructed first, is one full square, split to the center from one side, then pulled up to overlap and meet the angle required. The center hole was then scribed off the can, cut out, and the edge marked for a 7/16" flange, which was turned over the stake with a hammer. The peaks were raised by driving the lap-soldered assembly into a shot bag with a hammer and a 4" wide cocking tool, while a helper held on tightly.
The interior upper cap (dome) started its life as a flat determined by the petal circle, with ½" added for the downturn. The edges were brought down by trapping (shrinking), and the center raised very regularly on the shot bag. Oh yes, I know it could have been spun, and I do rely on a good spinner. But, egad! How often do I get to hand form one?â¦And there was no waiting.
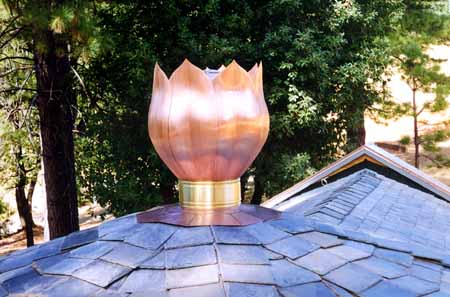
The dome and brass trim ring on the completed, installed finial
The brass trim ring went on like an oversized hose clamp, the edges treated with the ogee motif (an ``s" bend done in the rotary machine). The screw-and-tab affair tightening the band is all brass, riveted on, and then rotated to the one side of the building not offering visibility.
Final assembly and installation took a full day, with lots of suggestions from the spectators for nighttime illumination, and some fractured slates despite thick foam, plywood sheet, and considerable effort at contortion. One heavy winter has given it a good breaking in and so far, so good.
For more information see our Copperworking Page
Part 1 | Part 2 | Part 3 | Part 4 | Part 5 | Part 6


