Aluminum Welding Part 4
|
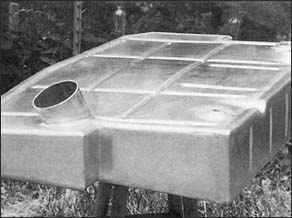
Aluminum racing tank completely torch welded. No leaks on the first test. |
PROCEDURE
Get the best fit-up possible to avoid large gaps, and select filler metal no thicker than the panel to be welded. Apply flux, and set flame a bit hot for tacking, then apply tacks 1 to 1 1/2 inches apart. Don't worry if distortion or stress causes some tacks to crack.
(Note: a professional 1 3/4-hour video is available from TM Technologies filmed through the special lens showing the OFW process clearly.) When tacks are complete, weld the panel completely from one end to the other.
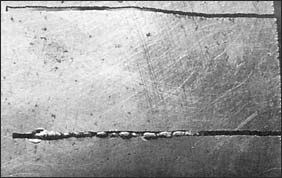
Distortion can be controlled somewhat by clamping, joint design, hammering, or prying as you go. Chill blocks, while very good for GTAW are actually detrimental for OFW because of the additional heat required. When constructing tanks, for
|
|
CLEANUP - GETTING STUFF TO STICK
Flux cleanup begins by using hot (180 degrees F) water and the stainless steel brush immediately after welding, followed by liberal rinsing with fresh water. If only the filler was fluxed, the amount of cleanup will be minimal. Tanks and similar enclosed parts may be rinsed in this fashion, or as an additional precaution, soaked in the following for 5 to 10 minutes, cold:
1 gallon Technical Grade HNO3 (58-62%) @ 39.5 degrees Be added to: 1 gallon clean water, hot or cold.
Note: Any flux residue in voids or pinholes can be a painter's nightmare in 6 weeks. If any particular area is suspect, play a neutral flame over it, and any yellow-orange incandescence will betray residue.
As mentioned previously, an invisible oxide film appears nearly instantly on aluminum alloys. Proper scrubbing with an etching solution and waiting no longer than 20 minutes to prime, seal, or fill, will avoid such sundry unpleasantness as lifting, peeling, or blistering. A good acid etch also insures against any small traces of flux residue.
|
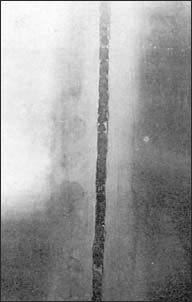
A chill block was used to back up this side of a gas tungsten arc weld. Compare this to the previous photo- both welds are made using the same amperage. |
Follow the rules and take time to practice this century-old art, and if the parts don't turn out pretty darn nice, they can always be used to cook sand dabs!
Kent White has been a restoration metalman for 25 years. Kent has worked with many fine old craftsmen, and in 1976 became a Master Technician at Harrah's Auto Collection where he worked on boats, cars, and aircraft. He started TM Technologies in 1989 to help revive the traditions, tools, and methods of restoration metalwork.
Back to Articles by the Tinman


